Caliper Mounting Brackets
I decided on 1/4" (6 mm) mild steel plate for the mounting brackets, assembling from 3 component parts as shown in the schematic.
The actual caliper mounting section (caliper plate) is fairly straightforward and I used the caliper itself as a drilling template.
For the “carrier plate” I made a template from the drum brake backing plate and did a test fit to ensure the height would fit inside the hub/disc combination.
It seems to fit ok, now all I have to do is join them together keeping everything parallel and square.
Now there's a challenge, you don't normally see "me", "welding" and "accurate" in the same sentence......
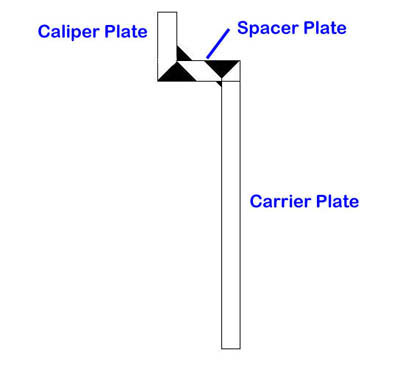
Schematic mounting bracket
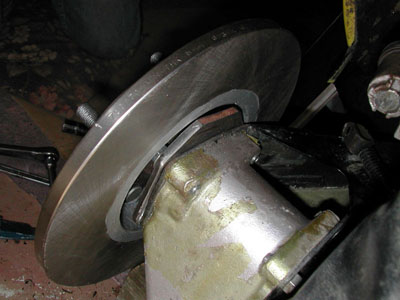
Test Fit of the Carrier Plate
As you can see, the Carrier plate dimensions came via the "suck it and see" school of engineering.
I cut out a blank steel plate using the brake backplate as template for the holes, bolted it to the arm and then slid the disc on the hub.
Where it met the carrier plate I marked and cut away.... as I said, the high tech approach.
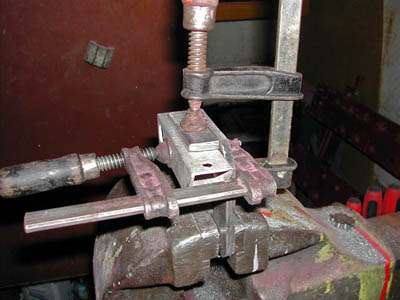
The next two photos show an equally high tech approach to welding assembly of the component parts.
I used a square section tubing to clamp parts together at 90 degrees, tack welding the ends before grinding a V section to fill with weld.
This was balanced with a fillet weld on the opposite side. The ideal principle was as shown in the schematic, the real world practice wasn’t quite so neat.
I struggled to think up an accurate method for welding the caliper plate to the rest and keeping everything aligned properly.
It’s not just a simple 90 degree weld, you need alignment along all three x-y-z axis which means the dimensions and cutting of the “spacer plate” is critical if the caliper is going to end up parallel to the brake disc.
Trying to keep everything in line
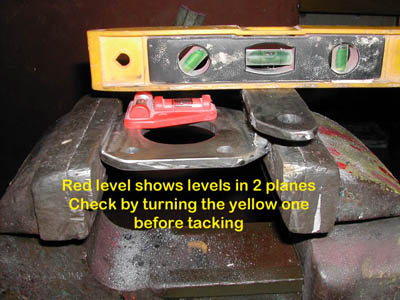
Spirit Level checks
I decided on spirit levels to check for parallel between the hub carrier plate and the caliper mounting portion.
This is fairly simple and does appear to work ok, it's fairly obvious when you can see the bubbles all aligned and you just tack it in place.
And of course, once the tack welds have cooled you find everything out of alignment. Tap it back into place, put on more weld.... rinse and repeat until it stops being awkward.
To ensure the caliper mount is parallel with the hub mount I also checked with a vernier gauge, in theory this should give you measurements to within 0.001", plus or minus whatever my personal measurement error is.
I’m sure this all seems very amateurish to most folks, especially those who have engineering backgrounds. Ideally I would have loved to weld everything together out of 3/8” steel and then mill or machine to get perfect alignments.
The snag is I don’t have those sorts of facilities, just a bench, welder and selection of hand tools which perhaps explains
the “garden shed” approach.
Click on the button for the Final stage