Caliper Brackets : Final fabrication
By now we have the lower carrier mount section completed and also the holes drilled in the caliper mount section, it's time sort out the last dimensions we need, that which allows the caliper to be centralised and parallel to the disc
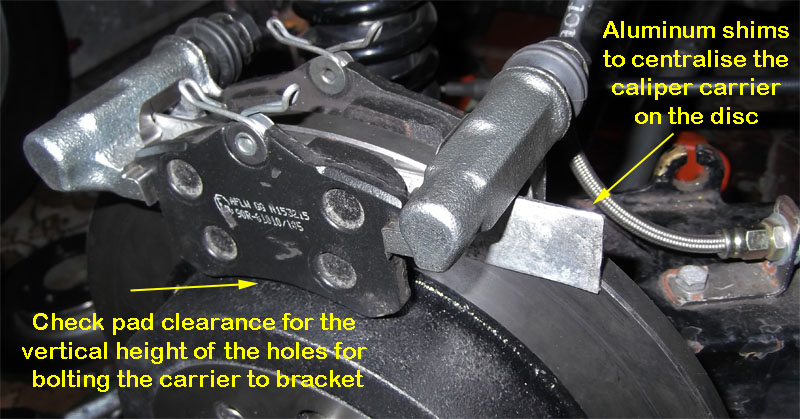
Aligning the caliper to the disc
What we're tring to achieve is the channel in the caliper (or caliper holder as above) ending up parallel to the disc. As you can see I used shims to lock the caliper in place over the disc before measuring where the bracket should go.
It's straightforward; if the caliper channel is 12mm wide, the disc 10mm thick then you need 1mm of shims either side. In the image above you can see the rear caliper carrier bolted to the bracket and held in position with two strips of 1mm Aluminium.
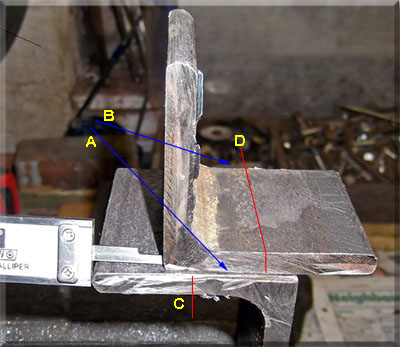
I couldn't get a good shot of the measurement stage, hence the mock up shown here.
Firstly, to get the caliper positioned as in the top image, you'll have to trim back the caliper bracket to stop it hitting the disc, where the red line is on this shot.
This is a "make it up as you go" stage but it's important not to take off too much at one go. IIRC I made a few cuts at around 5-6mm each which left me with a slight overhang but still clearing the disc.
The measurement you want is "A" but you will be more accurate measuring "B". If everything is aligned you should have identical measurements across the lower hub carrier section.
If you are handy with your welder you might even be able to get a tack weld in place at "A". I wasn't....

Measuring for the caliper mount
Right, so now we know where to weld the two sections together and hopefully without distorting anything at the time. This is the sequence I used....
Weld Sequences for the caliper mount
With both parts on the bench and clamped into position, my first welds were at either end of the brackets, shown as "A" and "B" on the photo. I'm over cautious here so I tacked both ends and then re-checked the fit on the car before fully welding both ends.
That gives you a very rigid bracket which isn't going to move unless you are very silly with subsequent welding.
The next stage is to take a slitting wheel and cut away the excess metal on both components shown as the red lines at "C" and "D", leaving you with a 6-7mm land for your main fillet welds.
Balance both sides when welding, I think I put about 20mm down the middle of either side to start and just balanced the rest as I went along. It isn't going to distort unless you're trying very hard....
By this stage you should have 4 brackets looking something like the last image, or hopefully with better welding !
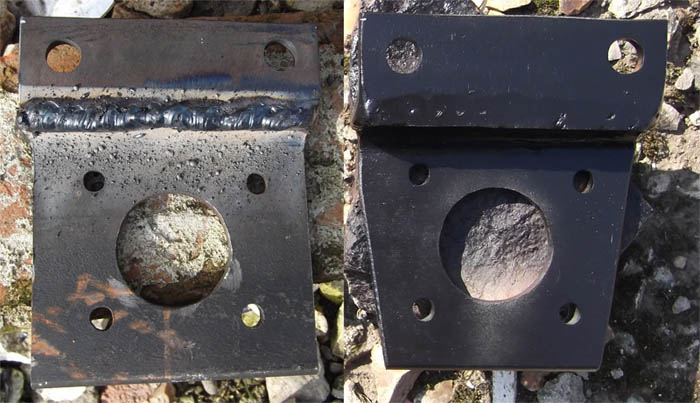
Rear bracket completed
I admit I overdid the fillet welds on both sides purely for cosmetic reasons because it allowed me to grind everything back to give a neat square profile.
There's also plenty of scope to remove metal excess weight without compromising rigidity but I must admit I just wanted to get the car back in one piece at that point. Maybe next year....
Click on the button for how it all looks