Dual Circuit Brakes Pt 2
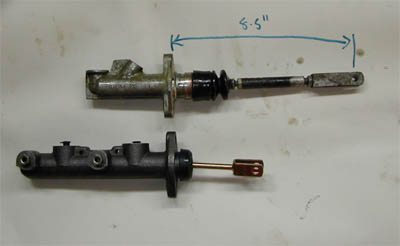
Right, the next stage is to remove the OEM part & bolt in the new one. As can be seen from the next picture, the actuating rods need to be changed over, or at least the Tandem push rod needs modifying & threading to accept the Lotus extension.
I decided against modification because the diameter of the new one is slightly less than the OEM rod and hence the resultant thread didn't look deep enough to me for a critical item.
New m/Cyl modified and it's installation time, a simple bolt in job.

Master Cylinder push rods need changing over
Points to note - the new cylinder has metric threaded fittings for the brake unions so you'll need some modern couplings. I used new brake pipes rather than modify the old ones, the cost is minimal and although it takes more time, it's much easier to work with new materials than old. The primary circuit goes to the front brakes, the secondary to the rear brakes on a front/rear split.

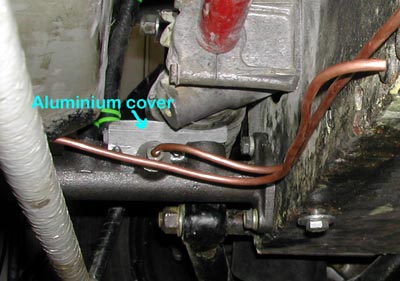
Aluminium cover to seperate Bellows and Pipework
The reservoir now needs to be remote, and as with the OEM installation, it is all very close to the steering rack bellows.
I used 90deg plastic elbows coming out of the first chamber and a straight connector for the second (forward) chamber.
In truth the new installation is fractionally lower than the OEM m/cyl and brake pipe but I decided to fabricate a small aluminium cover, as shown in the photograph, to securely isolate the rack bellows and the filler pipework.
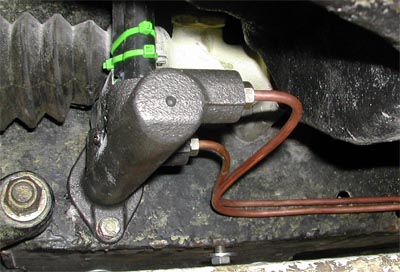
Another view of the installation, showing the newly modified fibreglass which allows better access to the forward brake pipe.
It would be possible to do the job without the fibreglass modifications, but this way means a more shallow bend on the front pipe, is less of a struggle and makes spotting any leaks at the front pipe much easier.
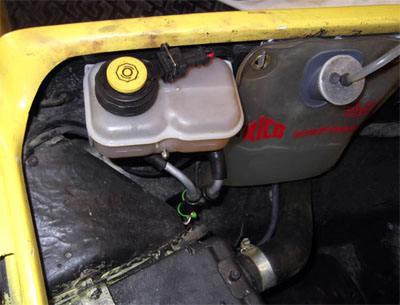
The two filler pipes go through the original hole into the front boot with the new 2 chamber reservoir mounted on a new bracket in the same place as the OEM single reservoir.

Modified undertray gives pipework more clearance

Remote Reservoir with Low Level Alarm
The final image shows the new reservoir complete with a low level switch, crudely wired to a dashboard light. I say criudely because at the moment the only way to test it's working is to lift the cap up !
The reservoir and switch are common parts for modern kit car builds and easily available. Mine came for around £20 from Ebay and listed as a "Land Rover" standard part.
(You can also see the yellow dust and overspray from last summer’s respray still hanging on in the radiator top. I really must get around to cleaning up... hmm, best not to rush these jobs, eh ?)
The Greenstuff pads were installed several weeks ago for the MoT, so it's job done, time for road testing.
Well, how different is it in practice with no servo and a smaller m/cyl bore ?
Hmm, now this is a strange one. I know the servo was working properly and as expected the reversion to a 0.7" bore has restored the pedal travel to the original design, but the overall impression is that removing the servo has had very little impact on the braking performance in terms of pedal pressure. It's notable, but nothing alarming.
It's still very easy to lock the front wheels with a deliberate stab to the brake pedal, and if you brake normally with a gradual increase in pressure then basically there's nothing to choose between the systems in terms of usability.